


How to Create Fillable Forms in Word
Microsoft Word can create Fillable Forms, which are a digital form that are filled out on the computer and then sent via email or printed out. A form completed this way insures consistent data collection and eliminates the hassles of poor penmanship.
This tutorial will start with a form that was originally created as a Word table and demonstrate how document controls can be used to create fillable form.
Using form controls to create a fillable form.
Activate Developer tab on the ribbon
If the Developer tab is not already activated, right click on any blank space on the ribbon and choose customize ribbon from the short cut menu.
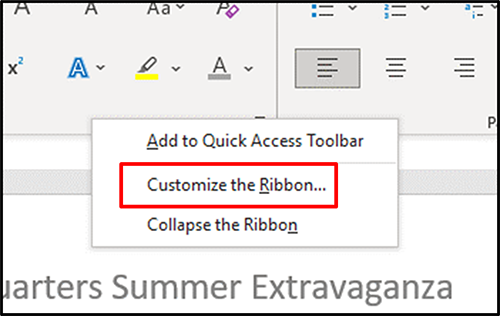
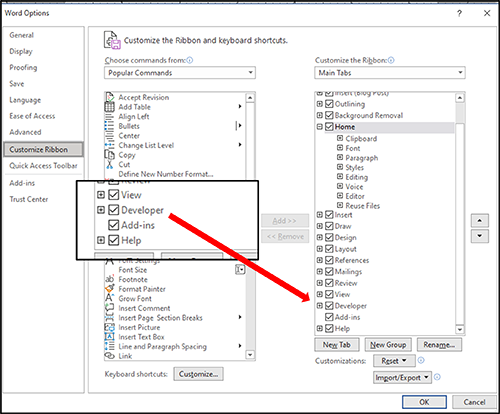
From the Customize Ribbon dialog box click on the check box next to Developer option in the lower right hand corner of the dialog box.
Go to the Controls group on the Developer tab
The Controls Group on the Developer tab contains virtually all the tools needed to create the fillable form. MS Word has Legacy controls for backward compatibility and ActiveX controls for more flexibility.

This tutorial will use a check box, combo box, date picker, option button (aka radio button) and plain text control. For each of these controls there are separate properties that can be adjusted, and design mode allows changes to made to the control labels.
Add Date Picker Control
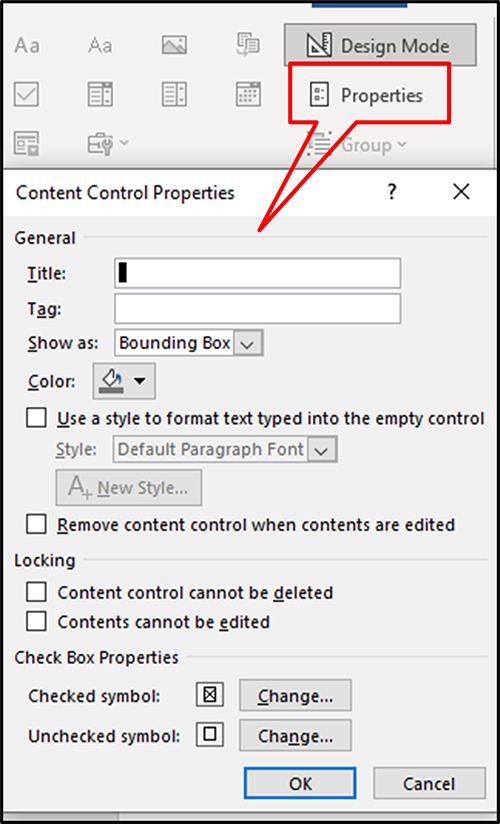
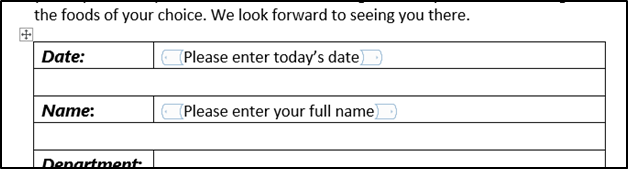
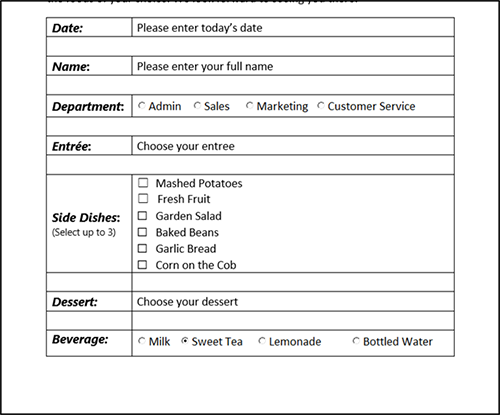
Click in the table cell corresponding to the Date field and choose the date picker control from the ribbon. Then choose the Properties command from the controls group on the Developer tab.
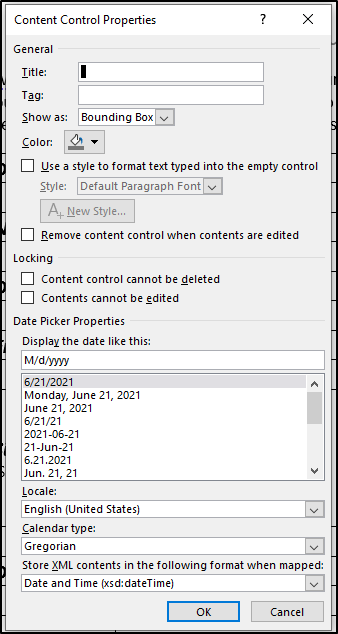
Design Mode allows the instructions to the reader to be customized. Design mode is a toggle – it is either on or off. With the Design Mode on type in Please enter today’s date for the date picker instructions
Add Plain Text Control
Click in the table cell corresponding to the Name field and choose the plain text control from the ribbon. Then choose Design Mode from the controls group on the Developer tab. Type in Please enter your full name for the instructions for the plain text control.
Add Option Button Controls
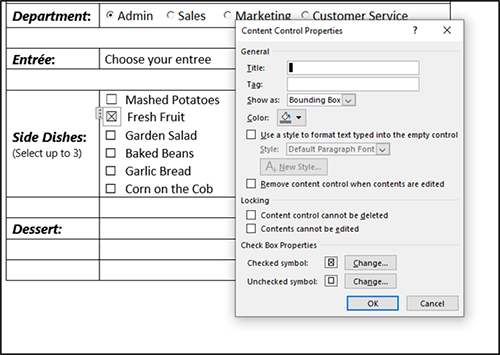
Click in the table cell corresponding to the Department field and choose the option control from the ActiveX section of the Controls group on the Developer tab of the ribbon. Then copy the command and paste 3 times for a total of 4 option buttons.
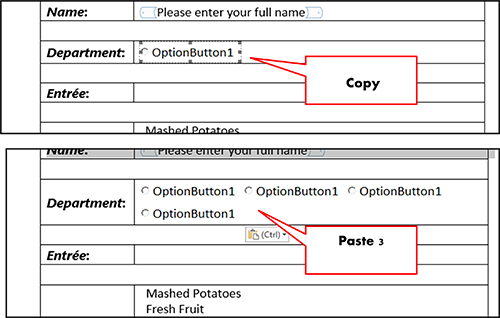
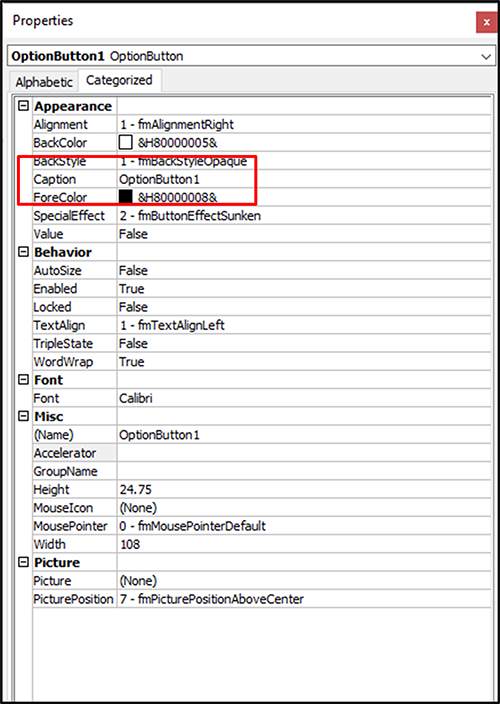
Right click on any of the option button controls and choose properties from the short cut menu. The Properties command from the controls group on the Developer tab. This properties dialog box looks much different, this is where each option button will be assigned its label. Look for the caption options, add the desired name here. Do this for each of the option buttons.
The four department names are: Admin, Sales, Marketing and Customer Service. After naming each of the Radio buttons the command buttons can be used to size the labels in such a way that there is only one row in the Department field.
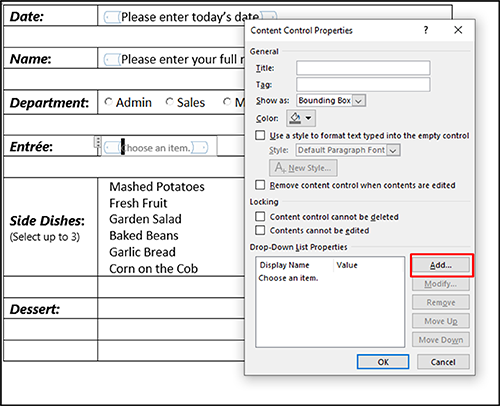
Add Combo Box Control
Click in cell corresponding to the Entrée field and choose Combo Box Control from the Controls group. Then select properties, this is where the choices for the entrée combo box will be entered. Also, Design Mode will accommodate the instruction Choose your entrée.
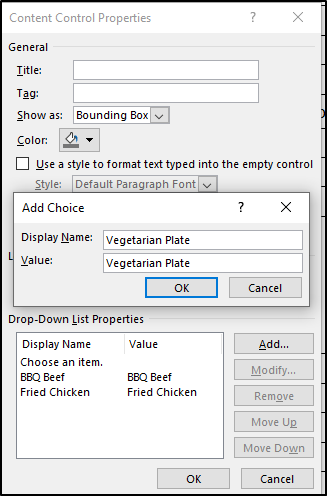
Add three entrée choices: BBQ Beef, Fried Chicken and Vegetarian Plate
Add Check box
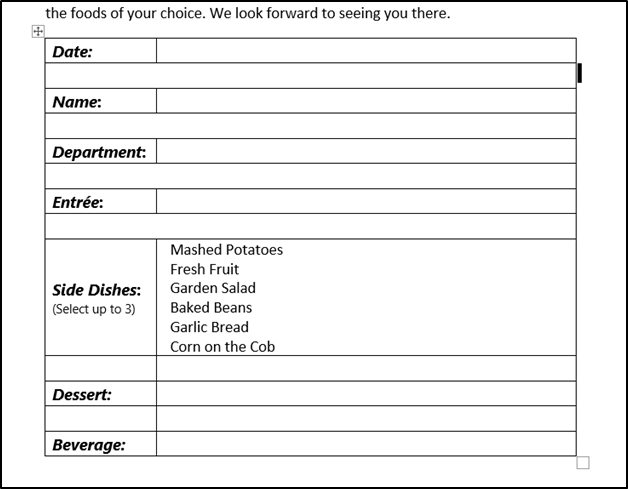
Click in cell corresponding to the Side Dishes field and one at a time click next to each of the side dishes then choose Check Box Control from the Controls group.
Add another Combo Box and Option Buttons Control
Using the same techniques from earlier in this tutorial a combo box for dessert has been added to the form as well as option buttons for beverage.
Finalize Form
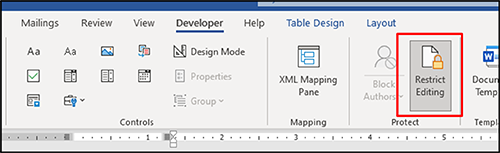
Now that all of the controls have been added to the form it is time to protect the work that went in to building the form. Located on the Developer tab just to the right of the Controls group is the Protect group. In the Protect group. Restrict Editing is located.
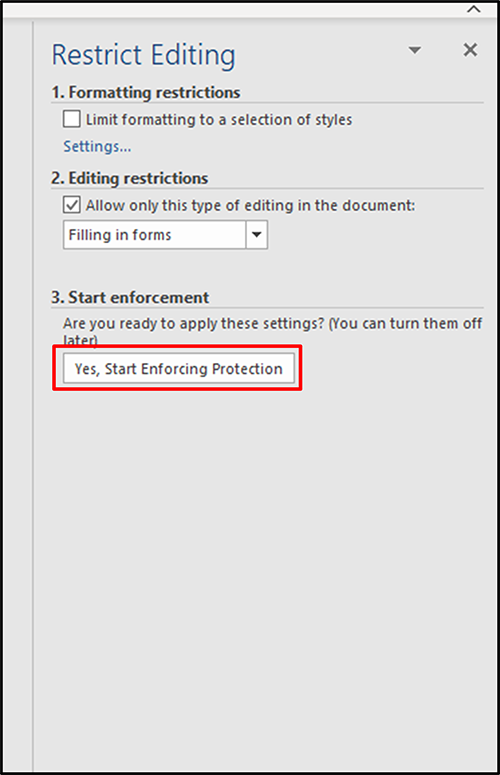
Restrict Editing offers the opportunity to only allow the form to be filled in unless editing permissions are restored. All that remains is to start enforcing the protection and the form is ready for distribution.
Thanks for checking out this tutorial. If you need additional help, you can check out some of our other free Word tutorials, or consider taking an Microsoft Word class with one of our professional trainers.