|
On-Demand Training Free Demo |
Below is a demo of our On-Demand training classes.
Locking cells is a relatively simple process and is available across all versions of Excel.
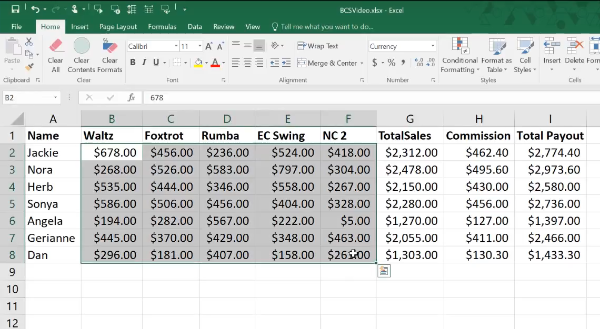
Step 1: Select the Cells You Want to Unlock
By default, all cells in Excel are locked. However, the lock feature of Excel is only activated when the spreadsheet is protected. Use the cursor to highlight the cells you want to include in the Lock. The cells that are selected will be highlighted with a green border.
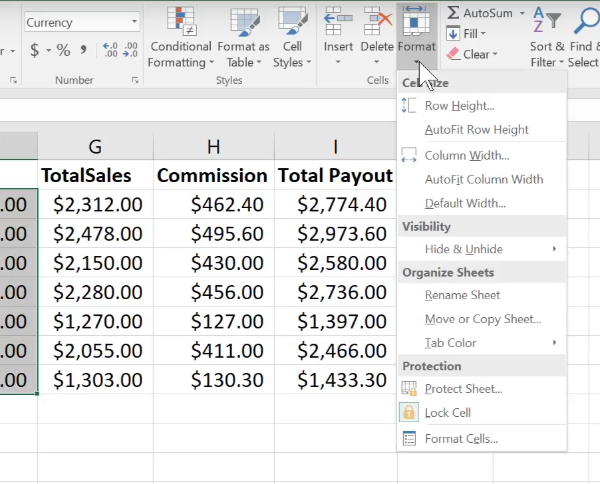
Step 2: Unlock the Cells
To find the Lock Cells button, open the Home tab and look in the Cells Section. Click the Format Button and you will see a dropdown menu. In the Protection section of that menu will see the Lock Cell button. Remember the cells are locked by default, so we need to click that button to unlock the cells we selected. This will enable you edit those cells once the rest of the spreadsheet is Protected.
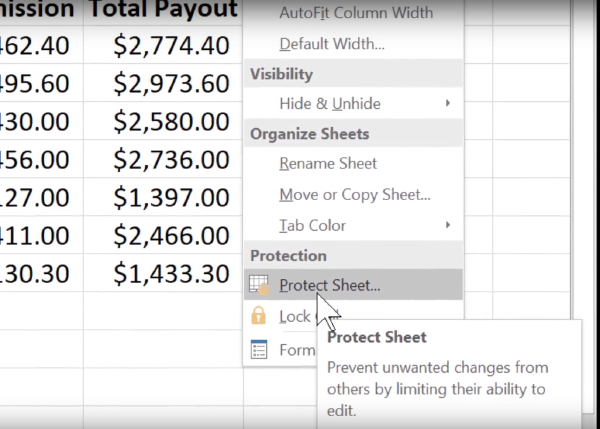
Step 3: Protect the Worksheet
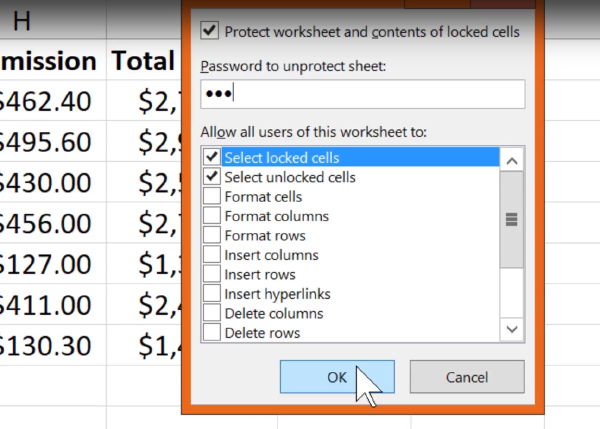
Now that you have unlocked the cells you want to remain editable, you can Protect the rest of the spreadsheet. Doing this will activate the lock feature on all the remaining cells. To do this, click the Format Button and you will see a dropdown menu. In the Protection section of that menu will see the Protect Sheet button. Click on that button and you will be prompted to set a password for the spreadsheet. Once you do that the document will be locked from editing, except for the cells which you unlocked in step 1.
For this example, we used the default settings in the Protect Sheet dialog box. We will cover some of the additional document protection features in a future tutorial.
Related tutorials
- How to Use Conditional Formatting in Excel
- How To Merge Cells in Excel
- How To Unmerge Cells in Excel
Thanks for checking out this tutorial. If you need additional help, you can check out some of our other free Excel formatting tutorials, or consider taking an Excel class with one of our professional trainers.