


How to Use AutoFill in Excel
This tutorial will cover how to use the autofill feature in Excel. Autofill is one of the best time-saving tools available in Excel, and is fairly easy to learn.
So what is Autofill? A simple explanation is that Autofill is Excel’s ability to help fill cells in column or rows with the data of formulas from other cells.
Cells can be filled up, down, left or right with common data types including dates (days, months, quarters or years) series of numbers. Users can even create their own custom lists of data to be filled in in multiple worksheets. It is as easy as drag and drop, using what’s known as the Fill Handle.
How to Autofill a Date Series
Excel is often used to record activities based on the date that activity happened. For example: daily sales, attendance, or incoming phone calls. You will often need a range of dates, or Data Series, in your data. Rather than typing each date individually, Excel can help produce a range of dates by using the AutoFill feature.
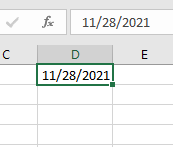
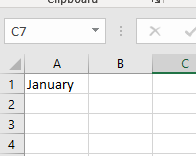
Step One: Enter the starting date in a cell.
Each formula needs to begin with the equal sign. The equal sign ( = ) instructs Excel that the information included after the equal sign should be calculated. You can enter the equal sign in the selected cell, or in the formula bar.
Step 2: Hold down the left mouse button on the Fill Handle
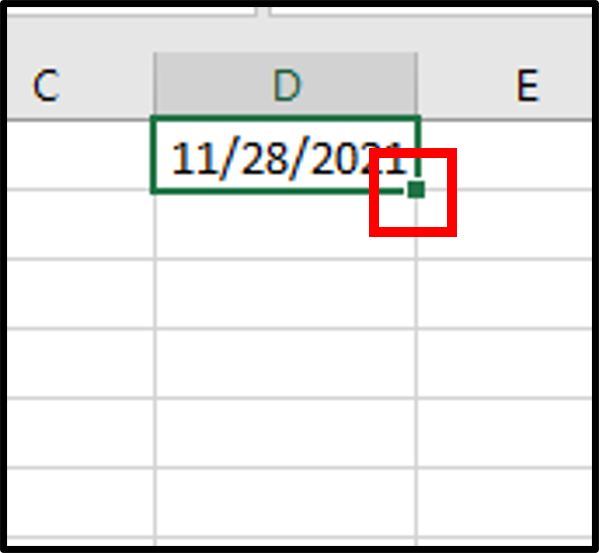
Select the cell with starting date and locate the Fill Handle. The Fill Handle is located on the lower right corner of active cell, and will be used to perform the AutoFill operation on the selected cell.
Step 3: While holding the left mouse button, drag through the remaining cells, release when at the end of the range.
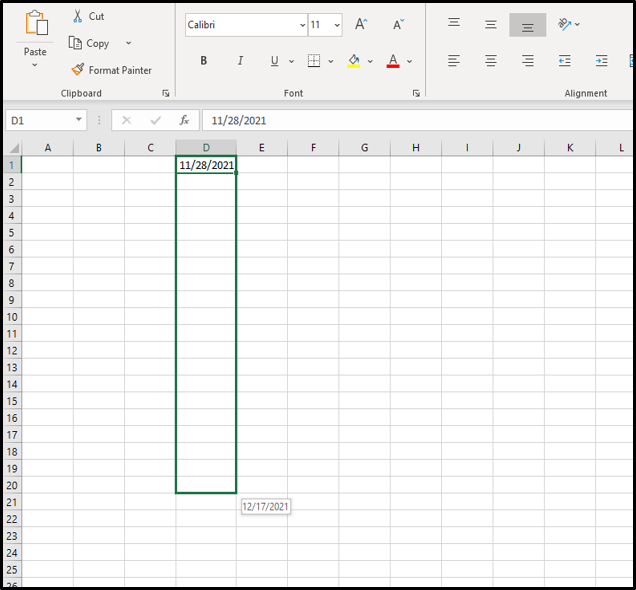
Result: The dates will appear sequentially in the range of cells you selected.
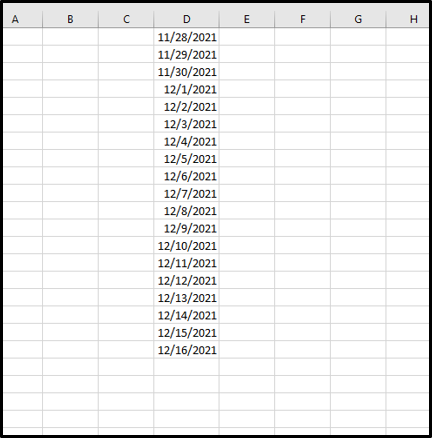
You can see how the autofill feature allows you to quickly add a large list of dates to your spreadsheet in a matter of seconds.
Notice the autofill options smart tag appears as soon as the left mouse button is released. We will use options from the autofill smart tag when completing other types of Autofill operations later in the tutorial.
How to Autofill a List or Text Series
Excel has several lists built in, most notably two for days of the week and two for months of the year. We can use the Autofill handle to generate these types of lists.
Step One: Enter value in desired cell (Day of the Week or Month of the Year).
Step 2: Using the fill handle drag down or to the right.

Select the cell with Day or Month entry and locate the Fill Handle. The Fill Handle is located on the lower right corner of active cell, and will be used to perform the AutoFill operation on the selected cell.
Step 3: While holding the left mouse button, drag through the remaining cells, release when at the end of the range.
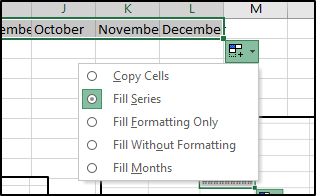
Notice that Excel fills in the months of the year. If the drag of the fill handle continues Excel will repeat the values.
Result: The Months will appear sequentially in the range of cells you selected. You can do the same thing for days of the week, and Excel will complete the operation similarly.
Topic #2
How to Use AutoFill in Excel
Thanks for checking out this tutorial. If you need additional help, you can check out some of our other free Excel Formulas and Functions tutorials, or consider taking an Excel class with one of our professional trainers.